The prospect of sanding stairs might sound like a daunting task, but fear not - armed with the right tools and techniques, it's a manageable DIY project that can make a huge difference to the look and feel of your home.
在这种循序渐进的指导,我们的专家大卫Hilton shows you how to breathe a new lease of life into a tired wooden staircase by stripping it back and freshening it up with a new paint job.
David shares his techniques forsanding woodand answers your sanding-related questions below.
What tools do I need for sanding stairs?
Before you get stuck into sanding your staircase, you will need to get your hands on the following tools:
- Sanders:I used 3types of sanderfor this project (A random orbit sander, a finishing sander and a triangular detail sander).
- Sandpaper / Sanding discs: I used 60 and 100 grit, then 120 grit when painting.
- Steel wool
- Dust masks / dust Sheets
- Paint stripper
- Personal Protection Equipment (PPE)
- Wood filler
- Nail removing pliers:Sidecutters can also work.
- A hammer
- Nail punch
- A ladder:to reach trickier areas.
How to sand a staircase: A step by step guide

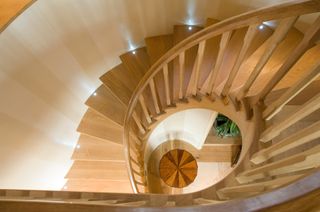
For this project, I'm working on a pre-made set of stairs with wooden spindles and handrail that is a combination of grained softwood and MDF. It's looking a little worse for wear, after being dark stained and varnished a number of times, as well as being covered in carpets for many years. I'll be stripping these steps back and freshening them up with a new paint job. If your own staircase is painted then you will need to check if it's lead paint before you start sanding, as this will make life more difficult (you don't want lead dust all over the place).
Step 1: Research
Try to identify how old your stairs are and how they were constructed (in case you need to repair any bits). and what wood they are made of so that you can plan the finish. You may want different colours in different areas. If you want to expose the wood grain, especially of the treads (often referred to as the ‘going’) then you need to be sure that all the treads are in good enough condition.
Step 2: Preparation
You will need to clear the area around and under the stairs and place dust sheets down. PPE is your friend when it comes to DIY sanding projects. Just like you would if you weresanding floorboardsorsanding doors- pop on a mask on to prevent breathing in dust particles. It's also a good idea to open windows and doors to keep the area well ventilated.
If the stairs have ever been carpeted then there will inevitably be many nails and staples, especially at the edges. These need to be removed first. Do not hammer these in as they could still catch the sandpaper and rip it. In the event that nails have been hammered fully in then use a nail punch to sink them lower than the surface.
Step 3: Stripping
If the stairs have many layers of paint or varnish it is worth using a good paint stripper to remove whatever you can. Paint strippers can be a liquid that is painted on, left to react with the paint, and then removed with a scraper, wire brush, steel wool, scourer or a coarse cloth, or alternatively a heat gun can be used but be careful not to burn the wood. You will need gloves when using paint stripper and always wear any other PPE as described by the manufacturer.
Step 4: Sanding
用粗砂纸或阀瓣(60粒)砂the flat open surfaces to remove loose materials and remaining paint/varnish/blemishes. A random orbit sander may be useful for flat areas but I found a finishing sander was more useful for the steps and the larger areas on the posts and runners, as the square shape sanding pad could get into corners. For the spindles and the handrail detailing, I found thatsanding wood by hand(with steel wool) was the best approach.
Step 5: Repair
Once the stairs were coarsely sanded I repaired the loose spindles and loose riser boards that had been kicked out of place over the years. They may need glueing or renailing/screwing in place. Many staircases are fixed from underneath so this is the place to start.
Step 6: Filling
Once the stairs were repaired, I filled any holes with wood filler. As the stairs were going to have some areas painted white and the treads simply varnished, I was more careful to only fill the gaps on the stairs that were absolutely necessary to avoid any unnecessary blemishes. On varnished surfaces – where you will be showing the wood grain – it's sometimes best to leave small holes and dents unfilled.
Step 7: A final sanding
Using a fine sandpaper (such as 100 grit) go over the sanded area to get a scratch free finish. Do not make it too smooth on hard wood as the paint may not grip or the stairs many become slippery. Remove the dust with a vacuum cleaner and a damp cloth, and you are now ready to start preparing for painting.
How long does it take to sand stairs?
A standard staircase of around 12 to 13 steps should take 1-2 days to sand and prepare for painting.
Can I sand the stairs myself or do I need a professional?
Sanding stairs takes time, patience and attention to detail. If you have some reasonable DIY skills and know your way around the tools, then you can tackle the task yourself.
What kind of sander should I use for stairs?
Stairs may need a few different sanders for the runners, treads, spindles and handrail. You could use a random orbit sander, finishing sander and also hand sanding on the tight areas.
Read Homebuilding's guide to thebest orbital sandersto find the right model of sander for your project.
What grit sandpaper should I use for sanding stairs?
Use rough grit such as 40 or 60 to remove old paint and level off blemishes. Then slowly use finer paper such as 100 grit for the smooth finish. Sanding pads are often more durable than normal sandpaper sheets so sanding pads may need to be even finer such as 120.
Read Homebuilding's handy guide tosandpaper gradesfor advice on which grit/grade is appropriate for different DIY tasks.
What is the best paint to use on stairs?
There are some specialist stair and floor paints and varnishes that are available at all good builders merchants and DIY stores, and these will need to be used for the hard wearing areas of staircases, such as the treads (going) and the hand rail. For the rest of the stairs you can use standard wood paint, but I would advise using a washable paint.