If you don't know how to wire a light switch, it can seem like a daunting task for any DIYer. But it’s a relatively straightforward job that involves a few simple rules that you need to know and follow to stay safe.
Here we look at wiring up a one way switch, which is the simplest type of switch. This will involve installing a switch with one toggle to turn one light on or off. If you have a two way light switch this can be more complicated, and for this reason won't be covered in this guide.
It's also worth mentioning that if you need to complete a larger scale electrical job such asrewiringyour home, this is always best left to a professional electrician with the ability to issue an electrical certificate. They'll also do a much quicker job as they have the know-how.
How to wire a light switch: A step-by-step guide
Before you start there are a few tools that you ‘ll need to do the job.
You'll need an specialist electrical insulated screwdriver set like theHilka Electricians Screwdriver Set from Amazon, a new light switch, wire strippers and electrical tape.
Once you have the tools, make sure you are completing the works during daylight hours as you will be turning off the electrics to your home.
1. Switch off the electric
Before you start you need to isolate the light switch so you are not working with a live circuit. Find your fuse box, where you will see a large on/off switch, push to off. As an extra safety precaution you can remove the fuse that controls the lighting circuit you are working on.
Now test the electricity has been switched off. Try the switch you are replacing and any other plugged in electric items – such as a lamp or TV – and check they are not working.
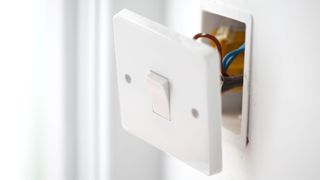
2. Remove old switch
得到一个合适的螺丝刀,轻轻的把年代witch plate. Place the screws somewhere safe so you don’t lose them. Now note which wires go where. Take a photo for reference.
Typically, a one way switch will have two terminals named COM (at the top) and L1 at the bottom. The brown (live feed) wire goes into the COM terminal and the blue (switch wire) wire goes into the L1 terminal. The blue (switch wire) wire will normally have a brown sleeve or tape indicating that it is also a live circuit and not neutral circuit as the colour would normally suggest.
For older wiring it's the red (live feed) wire that goes in the top COM terminal and the black (switch wire) wire that goes into the L1 terminal. Again, the black (switch wire) wire would normally have a red tape or sleeve indicating that it is a live circuit and not neutral.
3. Wire up the new switch
Loosen the terminal screws holding the wires in place and gently pull out the wires and put the old light switch aside. Check that the ends of the wires are neatly twisted together so there are no stray wires. Use a pair of pliers to tidy up if needed.
You may need to strip the wires with a pair of wire strippers and trim up with a pair of pliers. Leave around 15mm of bare wire and enough length so it's easy to wire up the new terminals. Place the brown or red (live feed) wire into the COM terminal and tighten. Give it a gentle tug to make sure it is secure. Do the same with the switch blue or black wire and place it into the L1 terminal. If the cables do not fill the terminals then the wires can be stripped further back and folded over to ensure a nice tight connection.
If installing a light switch that has a metal face plate like theBG Brushed Steel Light Switch from B&Qthen you need to connect the green/yellow earth wire to the face plate. Once complete tuck the cable into the back box and screw the switch plate back on, making sure it is secure. Finally restore the power to test that new switch.
What are the ‘new’ wiring colours?
The current standard wiring colours of green/yellow, blue and brown were introduced back in 2004 with all new wiring installations from the beginning of 2006 having to adopt these colours.
但是如果你住在一个家里regulat之前建造的ions came into effect the wiring will most likely be red, black and green/yellow (pre-1977 the earth was just green). The old live red wire was replaced by brown, the old neutral black wire by blue and the old green earth became yellow and green.
It is important that you note the colours and make sure you connect to the right terminal whenever doing any domestic electrics including wiring up a light switch orwiring a plug.

What does L1 and L2 mean on a light switch?
A one way switch will typically have a COM or COMMON terminal at the top and an L1 terminal at the bottom. A two way switch will add an L2 terminal alongside the L1 terminal.
Jordan Batchelor fromJB Electricalreveals what L1 and L2 mean, "There are two ways of connecting a light switch, one way and two way. In a one way switch installation you simply connect the incoming permanent live conductor into the common terminal and the switched live conductor (going to the light fitting) to the L1 terminal. Two way is used for when you have two light switches switching one light, e.g. one switch at both ends of a hallway. This is when you would use the L2 terminal."
While changing a light switch it could be a good time tochange a light fittingas you will already have the tools you need and the power turned off.
Are switch markings on a light switch all the same?
No. Different manufacturers can have slightly different markings on the inside of the switch. A typical one way switch will have a COM or COMMON marking next to the terminal at the top of the switch and an L1 marking next to the terminal at the bottom of the switch.
A typical two switch, which can be used as a one way switch will have an additional terminal marked L2 next to L1. However, it is worth noting that some manufacturers don't use the COM marking and instead simply mark the top terminal as L1 and the bottom terminal as L2 and L3.
Do you need to earth plastic plasterboard back boxes?
When installing a light switch the back box is typically recessed into the wall. These are commonly metal or plastic and which material is used decides whether it needs to be earthed as Batchelor explains, "There is no need to connect an earth conductor to the plastic pattress however it is very important to the safety of the home owner and the installation to always connect an earthing conductor to any metallic light switch and light fitting. If in any doubt always consult a competent and qualified electrician."