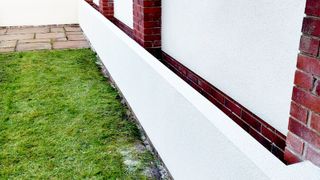
Got an ugly, old, crumbling wall? Then learn how to render a wall and you won’t any more. It's one of the popular reasons that a wall gets a makeover as builder Chris Longhurst explains, “A wall that has been standing for many years grows tired and looks shabby. Walls are subject to damage. That’s when a wall looks like it needs a lift and a good way to do that is to render it.”
Giving brick or blocks a smart new look enhances the ambience of your outdoor space and the beauty of render is that you can paint it a colour that matches yourgarden design. Here we look at how to render a wall, how to choose and lay the render and the best way to finish.
How to render a garden wall: a step by step guide
Here we guide you through the process of rendering a garden wall with the help of expert builder Chris Longhurst.

Chris is a full-time Staffordshire builder who has more than 40 years of experience in the construction industry. He has his own YouTube, Instagram andTikTokchannels with nearly 50K subscriber that provide how-to videos to aid builders and DIYers undertaking building tasks around the home.
1. Remove old render and prepare for new render
If your wall has old render the first thing you will need to do is remove it with a hammer and masonry bolster like theMagnusson Masonry Brick bolster & guard from B&Q. If you’re rendering an old brick wall you will need toremove a brick from a wallif it's damaged and replace it.
其他砖可能只需要修理建设者Chris Longhurst reveals, “Very often garden walls have bricks that have slight spalling, this is where the face of the brick has blown off. If the spalling is deep then before attempting to render the wall you will need to repair the damaged bricks, if it’s deep spalling then replace the brick. If it’s shallow spalling then fill with cement mortar until flush, then slightly scratch the cement before it hardens.”
Once your wall has been repaired you will need to clean and prepare as Longhurst explains, “After repairing the wall and scraping any moss, or loose mortar from the face of the wall using a wire brush and a light soft brushing down. Paint the wall with an SBR sealer, this seals the wall and helps the mortar from drying out too quickly. Another good tip is to paint the wall with a blue/red grip paint. This helps the first coat mortar from sagging, this is best used on walls with low suction such as engineering bricks.”

2. Choose and mix render
There are a few options when choosing render as Longhurst reveals, “There are many 25kg premixed rendering products that you just add water to the compound and you’re ready to go.”
Tarmac One coat Render from B&Qis one such product, but the alternative is to make your own as Longhurst goes on to say, “However, these can work out more expensive than using sand and cement. The correct sand is a render sand, it’s in between a soft building sand and a sharp grit sand. If you have a large area it’s cheaper to buy a ton of rendering sand and loose bags of cement.”
If mixing your own the ratio is typically six parts sand, one part cement and one part lime which helps prevent the render from cracking once it has dried. Use a hydrated lime like蓝色圆圈从百安居熟石灰. But you can use three parts sand, one part cement for a scratch coat.
3. Apply first coat of render
Before you add any render you need to measure up and cut your corner bead. This can be bedded into the base/first coat or add before you start rendering. Put render on the edges and press in the bead. Typically you need to look for 10-12mm corner bead.
Start by getting a mixing trowel and adding your render to a plastering hawk like theDraper ABS Plasterers Hawk from Amazon, fill so you have around half a hawk full. Now get a plastering trowel like thisSpear & Jackson Stainless Plastering Trowel from Amazon.
Start at the top and work left to right. Get a trowel full of render, hold at 45 degrees and push up onto the wall and roughly even out and repeat. Longhurst reveals how deep the base coat should be, how to smooth out and finish, “Apply a first coat called a scratch coat, apply to a depth of 5mm, ranging it flat with a straight edge, then run a scratch coating comb over the rendered area. When this coat has been allowed to set for at least two days, then a second coat is applied.”
4. Apply second coat of render and finish
When the base coat is ready it's time to apply the second using your chosen render as Longhurst explains, “First wet the scratch coat with diluted SBR, apply the second render coat at 5mm, flatten with a ranging stick, then float with a sponge until the render is flat.”
What is SBR and why use it in render?
Builder Chris Longhurst suggests that you seal the wall with SBR, “The best way to seal the wall is with SBR”. But what is SBR? SBR (Styrene Butadiene Rubber) is a bonding and waterproofing additive used when rendering exterior walls. It helps the render bond to the wall and improves water resistance.
What is the best way to finish render on a garden wall?
After a garden wall has been rendered and sealed with SBR (see above) you can leave if you are happy to have a natural finish. But, typically render is painted to fit its surrounding aesthetic and add more weather protection.
Thebest masonry paintssuch as Sandtex Masonry Paint andDulux Weathershield Smoothwill add long lasting weather protection as well as giving your wall a clean even finish.